- Гідрологія і Гідрометрія
- Господарське право
- Економіка будівництва
- Економіка природокористування
- Економічна теорія
- Земельне право
- Історія України
- Кримінально виконавче право
- Медична радіологія
- Методи аналізу
- Міжнародне приватне право
- Міжнародний маркетинг
- Основи екології
- Предмет Політологія
- Соціальне страхування
- Технічні засоби організації дорожнього руху
- Товарознавство продовольчих товарів
Тлумачний словник
Авто
Автоматизація
Архітектура
Астрономія
Аудит
Біологія
Будівництво
Бухгалтерія
Винахідництво
Виробництво
Військова справа
Генетика
Географія
Геологія
Господарство
Держава
Дім
Екологія
Економетрика
Економіка
Електроніка
Журналістика та ЗМІ
Зв'язок
Іноземні мови
Інформатика
Історія
Комп'ютери
Креслення
Кулінарія
Культура
Лексикологія
Література
Логіка
Маркетинг
Математика
Машинобудування
Медицина
Менеджмент
Метали і Зварювання
Механіка
Мистецтво
Музика
Населення
Освіта
Охорона безпеки життя
Охорона Праці
Педагогіка
Політика
Право
Програмування
Промисловість
Психологія
Радіо
Регилия
Соціологія
Спорт
Стандартизація
Технології
Торгівля
Туризм
Фізика
Фізіологія
Філософія
Фінанси
Хімія
Юриспунденкция
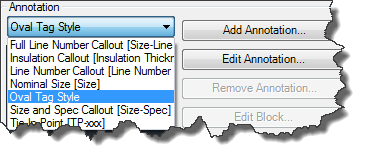
Annotations
Annotations are used if you want to annotate the objects (usually Equipment, Pipe Lines and/or Valves) in Orthos.
For PipeRunComponents there are already a lot of different types of Annotations.
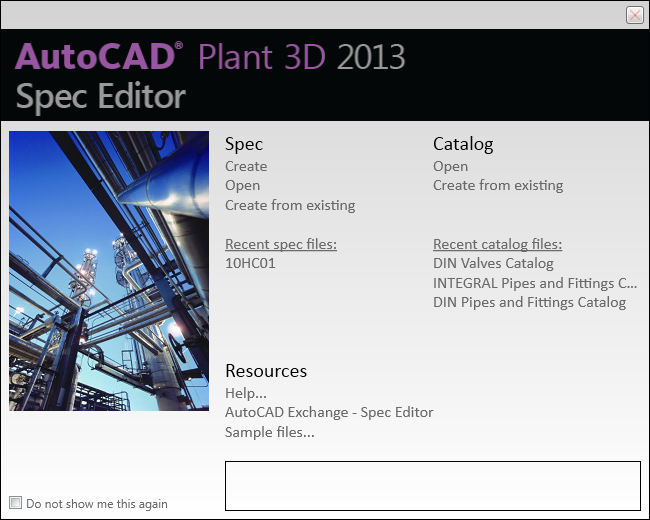
Step 5: Create Catalogs & Specs
Having the Catalogs and Specs ready when you start routing your pipe is one of the most important things. If the Specs aren’t ready at the beginning and you have to use some generic Specs you have to change your routed pipes during your project. It is actually easy to change the spec of a pipe line, but there can be still be issues, because now the flanges a longer then with the old Specs, or the actuator of a valve is much bigger, hence you have to adapt the routing and so on.
AutoCAD® Plant 3D allows you to create block based contents as well as the use of scripts which allow you a broad variety of shaps. And for the hard-core users out there, there is even the possibility to create your own scripts to have the shape you want/need.
Step 6: Setup AutoCAD® Isometrics
Setting up AutoCAD® Isometric is a big topic and needs a lot of experience. Explaining how to setup AutoCAD® Isometrics can take hours. Therefore I just want to give some hints before you get started.
Most of the configuration is done under the “Isometric DWG Settings” in your Project Setup. In addition to that there is the IsoConfig.xml file which does exist for each Style (e.g. Check_ANSI-B).
If it comes to the matter of creating your own Iso-Symbol you may want to take a look at the IsoSkeyAcadBlockMap.xml and IsoSymbolStyles.dwg in the Isometric folder under your Project Folder.
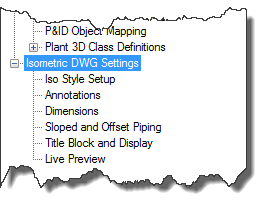
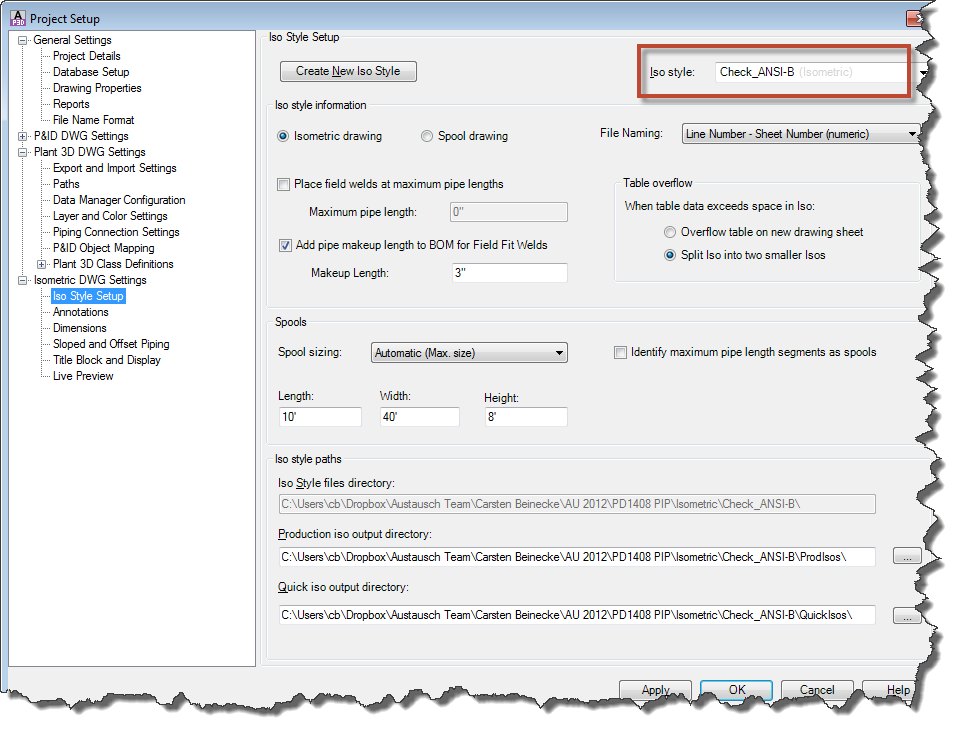
When switching between the different sections of the configuration (Iso Style Setup, Annotations, Dimensions and so on), make sure that you always use the same Iso Style.
Iso Style Setup sets up the general style of your Iso. You can for example switch to Spooled Isos.
Annotations allows you to setup what should actually be annotated. As soon as you activated one of the checkboxes under “Annotations shown on drawings” the corresponding section on the dialog will be enabled for further setup.

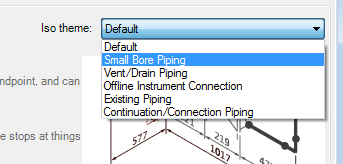
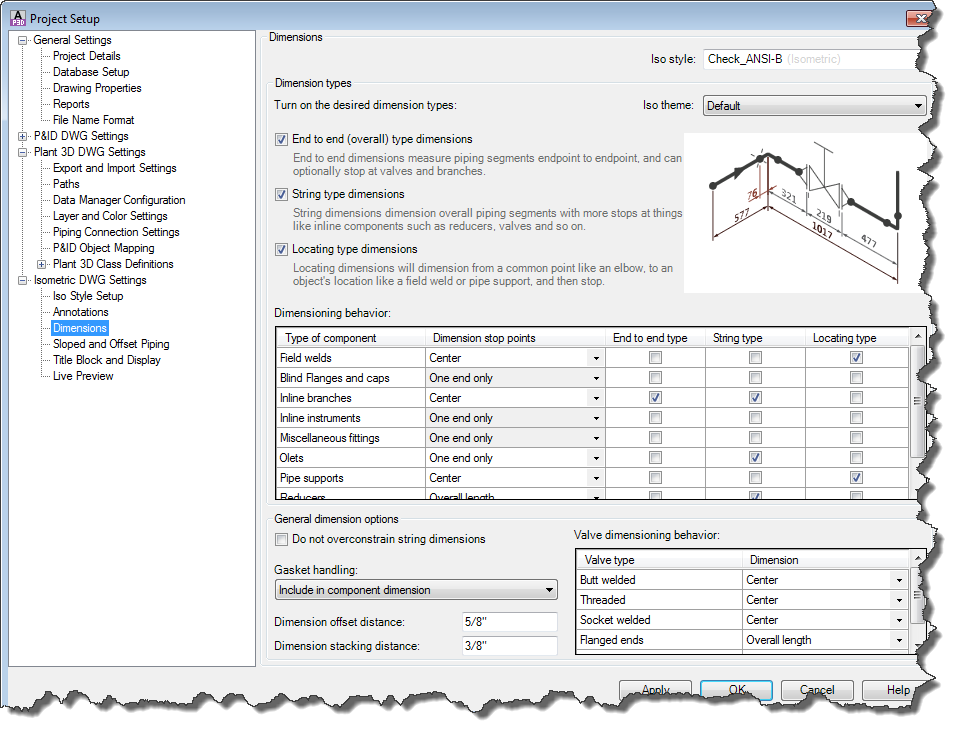
Dimensions allows you to setup the way the objects on the drawing are supposed to be dimensioned. If needed you can select one of the preset Iso themes.
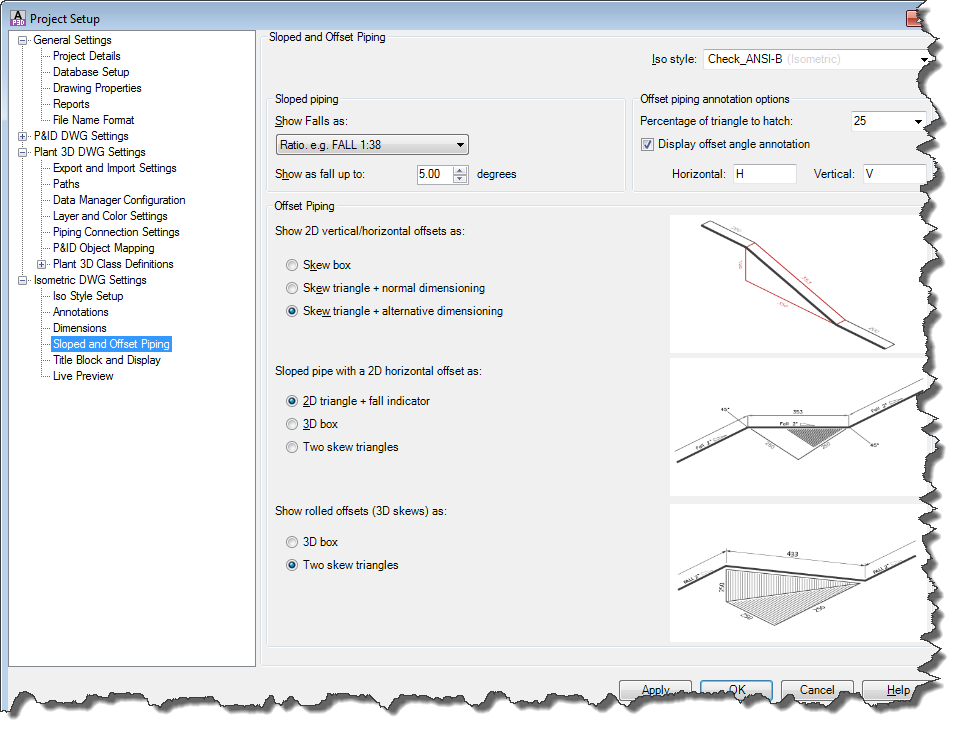
Sloped and Offset Piping allows you to setup the way you want to see sloped and offset piping
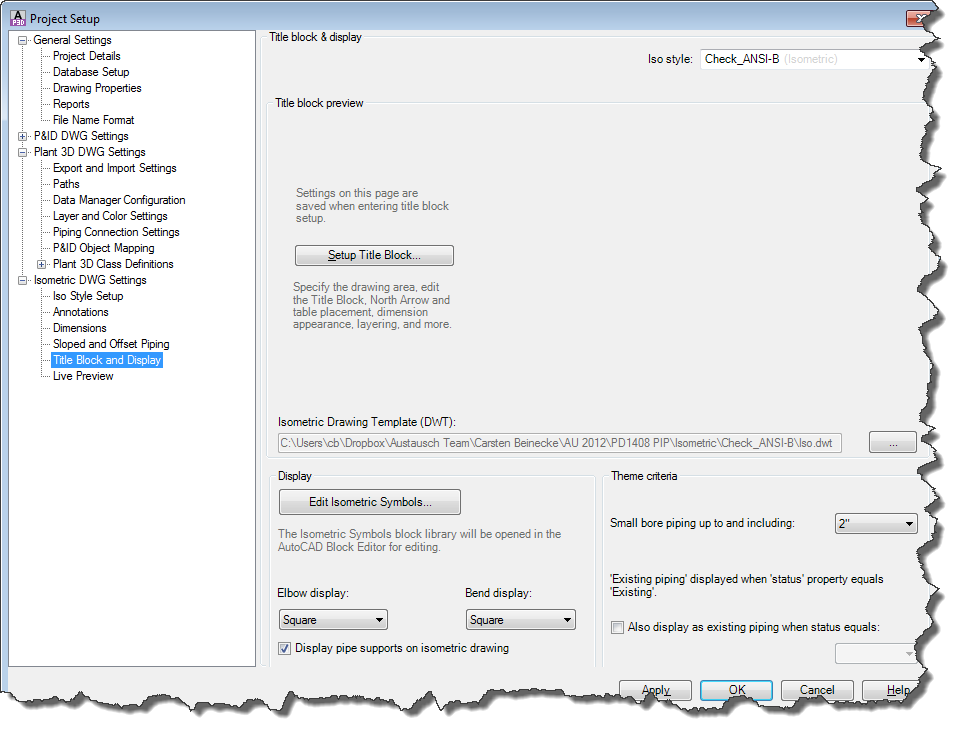
Title Block and Display allows you to setup the Title Block as well as editing the Isometric Symbols.
If you want to make changes to the Iso-Setup bring a lot of time, because you just get lost in the possibilities to adapt it to your requirements.
Step 7: Layer & Color Settings
AutoCAD® Plant 3D sets the layer and color of your PipeRunComponents automatically by default. If you want to handle this yourself, you can just turn it off.
Also you can define various Layer/Color Settings. Of course only one can be active at a given time.
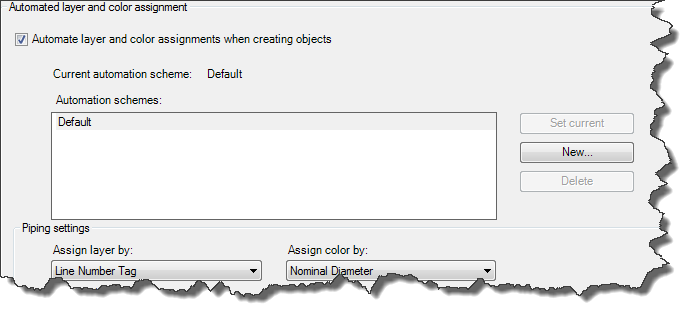
As a Layer you can select any Property of the PipeRunComponent class. You can of course create your own Property just for the Layer Control.
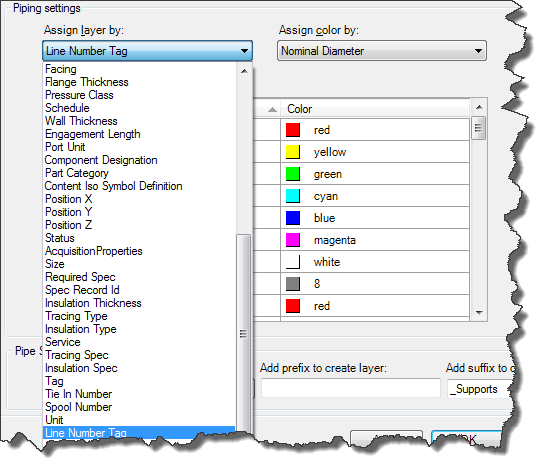
For the Color you can use any selection list. Again you can use your own Property using your own Selection List. For each of the values of your Selection List you can define a color.

Читайте також:
| <== попередня сторінка | | | наступна сторінка ==> |
| Step 4: Create Tags and Annotations | | | Step 8: Piping Connection Settings |
|
Не знайшли потрібну інформацію? Скористайтесь пошуком google: |
© studopedia.com.ua При використанні або копіюванні матеріалів пряме посилання на сайт обов'язкове. |